Why MS Azure?
- Best AD integration, which is very convenient when the same VPN account is used for multiple resources.
- Different types of authentication: phone call, SMS or offline OTP code.
- Ease of configuration.
- High reliability and trust.
As for the downsides, the only thing worth noting may be that it is a paid solution, but security has never been cheap.
Microsoft Azure Configuration
The steps below assume that you have a subscription or you have installed a trial version of Microsoft Azure.
Let’s move directly to the setup process:
- 1. Log on to the Azure Portal.

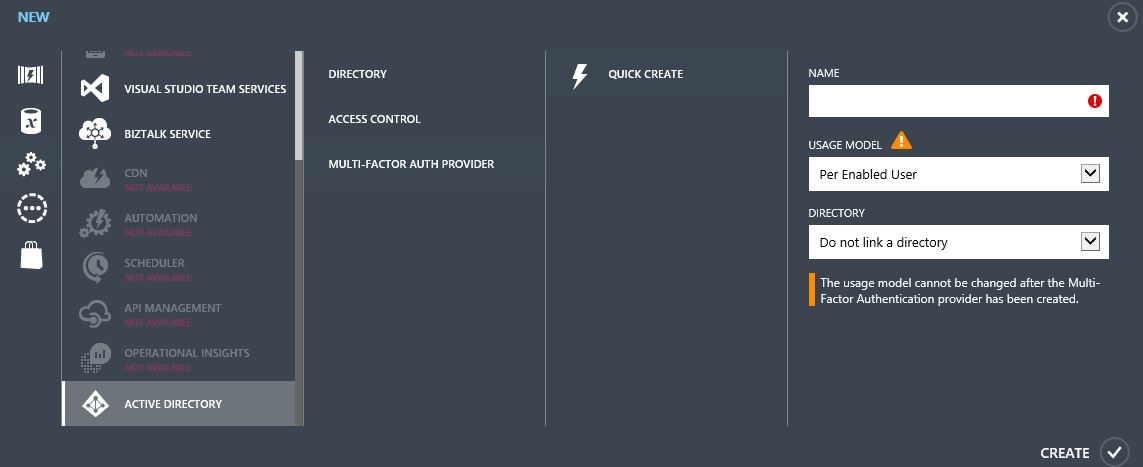
- 2. Click on the Active Directory tab -> Multi-Factor Authentication Providers -> select Quick Create. Specify the necessary parameters and click Create.
 After the creation provide has been created, the «Manage» button will be available; select it:
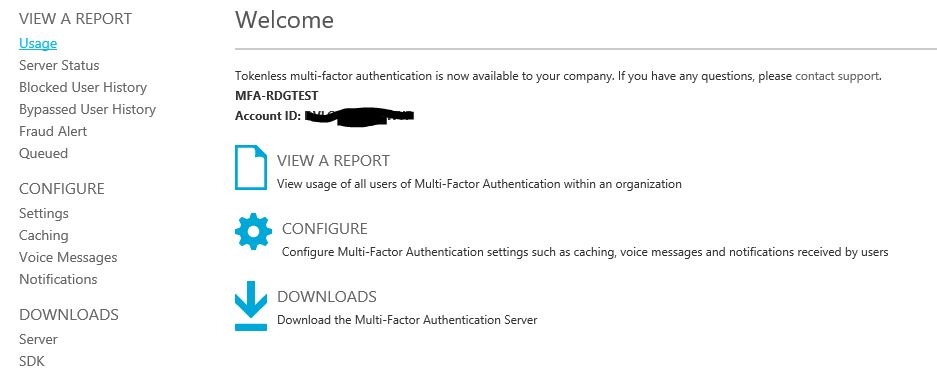
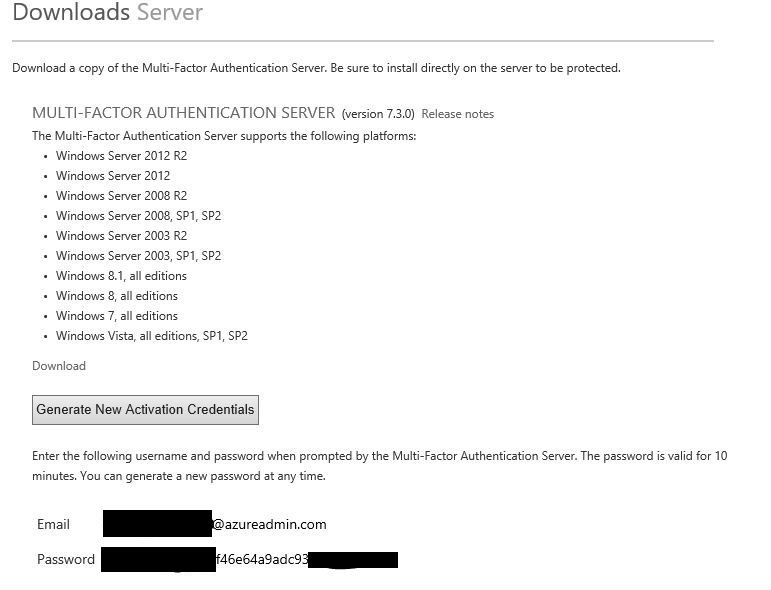
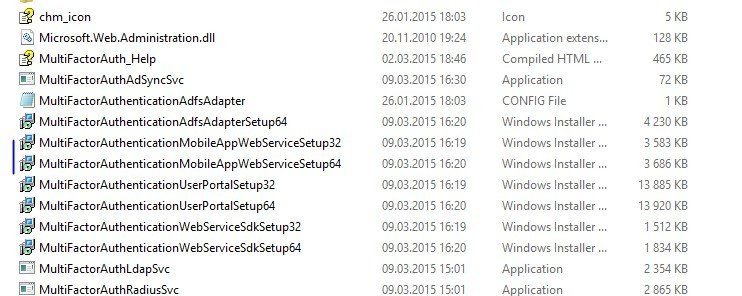
- 3. Go to Downloads. Download MULTI-FACTOR AUTHENTICATION SERVER. You also need to create an account to activate the server.
.NET Framework 2.0 is required to install this server.
Important: We recommend installing on a separate VM. Skip the configuration wizard during installation.
Server Features: user synchronization with AD, RADIUS server for Cisco ASA, submission of authorization requests by the second factor, reception and processing of client responses, user authentication. It can be installed both on server and client versions.
- When starting the first time, activate using the previously generated account (we do not need replication at this stage).
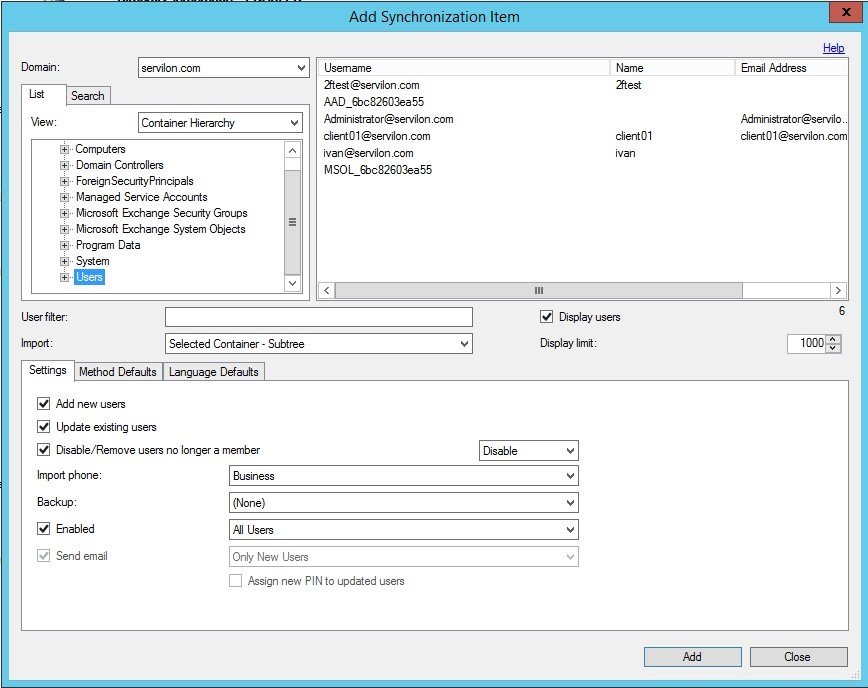
- Set up user integration between AD and our server. In the Directory Integration tab, add a directory that will sync with AD and configure the synchronization settings:

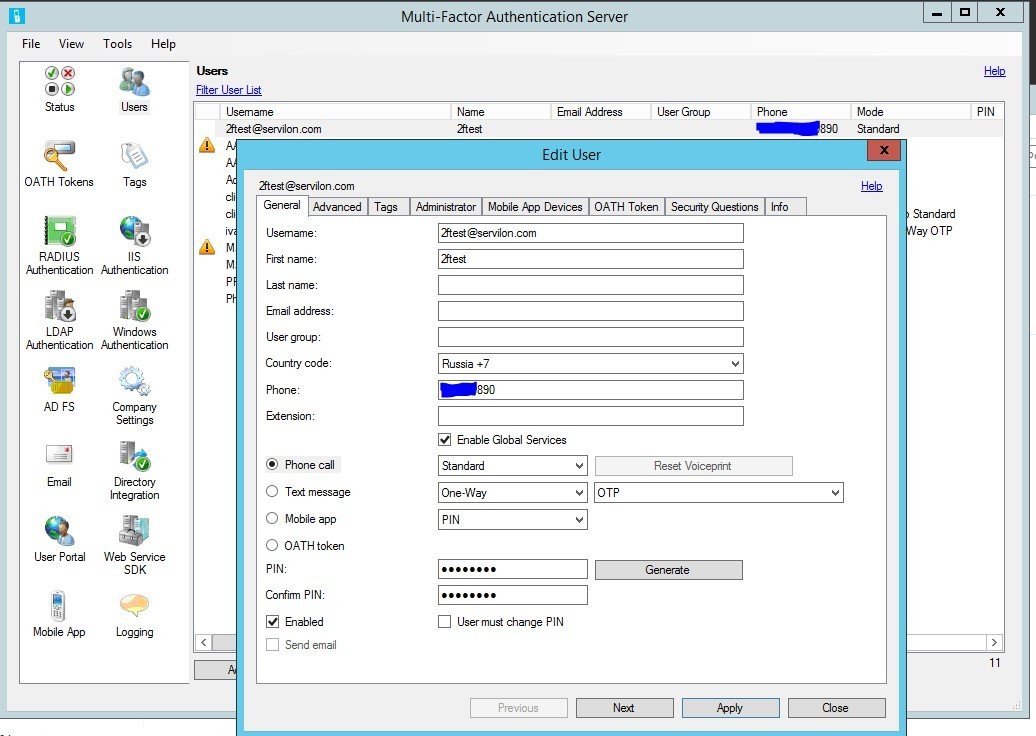
In AD, create a user and synchronize the user database with MFAS:
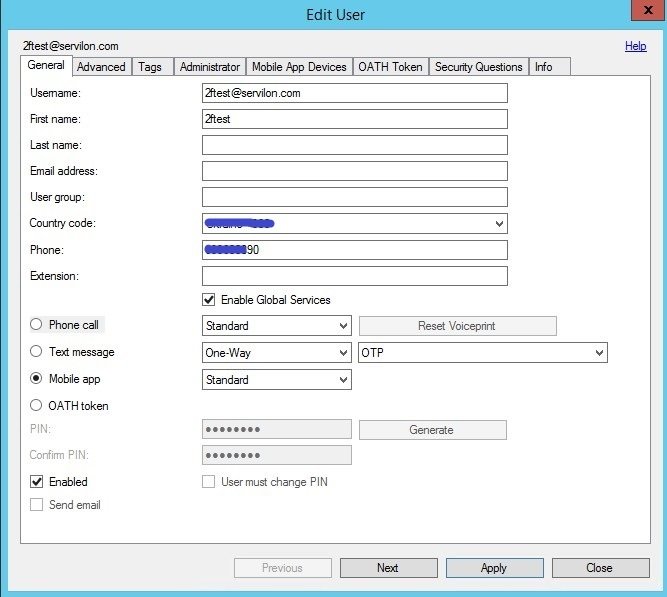
- a) Create a test user and enter a phone number:
- b) Save, click the «Test…» button in the «Users» tab. Enter the user credentials:
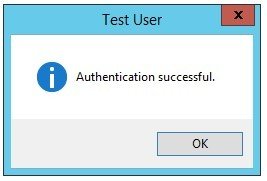
- c) After receiving the phone call at the specified phone number, press «#». Upon successful completion of the test, the following message should be displayed:
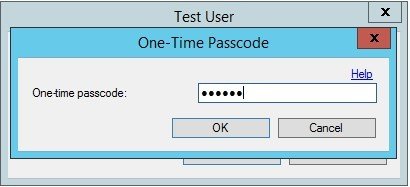

You can also test SMS-based authentication. To do this, in the client settings, specify the «Text message – One-Way – OTP» authentication method. In this case, the MFAS will ask for an OTP, which will come to your phone in a text message.
In order to associate a user with a mobile device on which the Azure Authenticator app is installed, open and configure the User Portal (Instructions to Install and Configure the User Portal).
You also need to install and configure the Mobile Portal:
- Go to the C:\Program Files\Multi-Factor Authentication Server directory;
- Select the correct version and install;
- After installation, edit the file:
С:\Inetpub\wwwroot\MultiFactorAuthMobileAppWebService\Web.confFind the parameters:
WEB_SERVICE_SDK_AUTHENTICATION_USERNAME
WEB_SERVICE_SDK_AUTHENTICATION_PASSWORD
and change the values to match the User Portal parameters.
In the pfup section, change the <valuе>… parameter to match the <valuе>… in the User Portal. In our case, «EXTERNALFQDN» is mfa.servilon.com.
Note that to use the User Portal you will need:
– A record in the external DNS zone that will point to the User Portal.
– A trust relationship with the server. Ideally, a «white» certificate issued for «EXTERNALFQDN».
After installation and configuration, in order for the User Portal to work correctly, enter the URL to the portal in the «User Portal» tab. If you are using domain user authentication, set “Primary authentication” as Windows Domain.
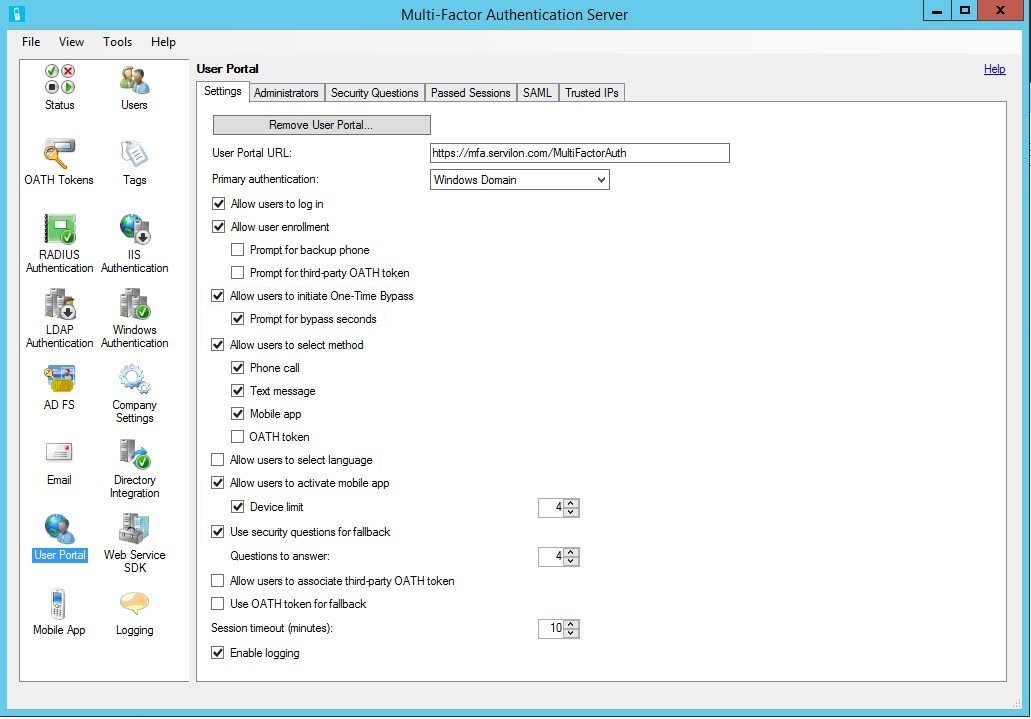
In the “Mobile App” tab, enter URL Mobile App Web Service and enable OATH tokens, if you want to use your mobile device as a software token.
The app works as follows:
- In Token Mode
- In standard mode without a PIN
After the portal is configured, to link the mobile device, click on the User Portal link.
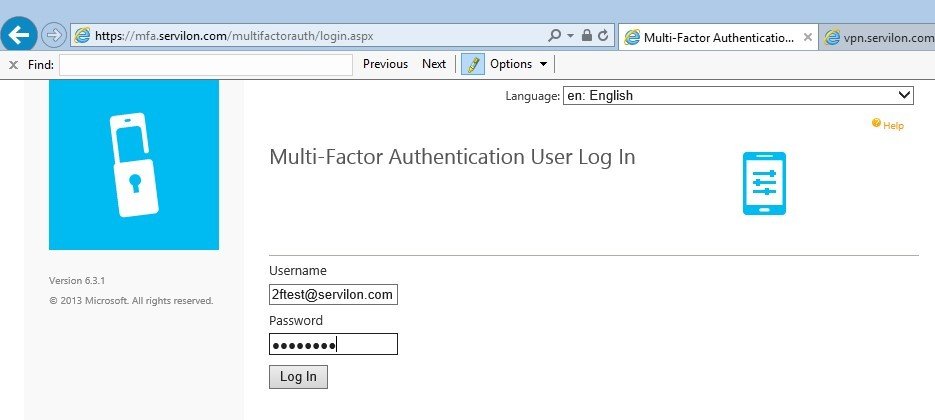
The first time you log in, you have to fill out the form with security questions. The user will then receive full access to the portal.
In the «Activate Mobile App» menu, click «Generate New Activation Code». The result should look as follows:
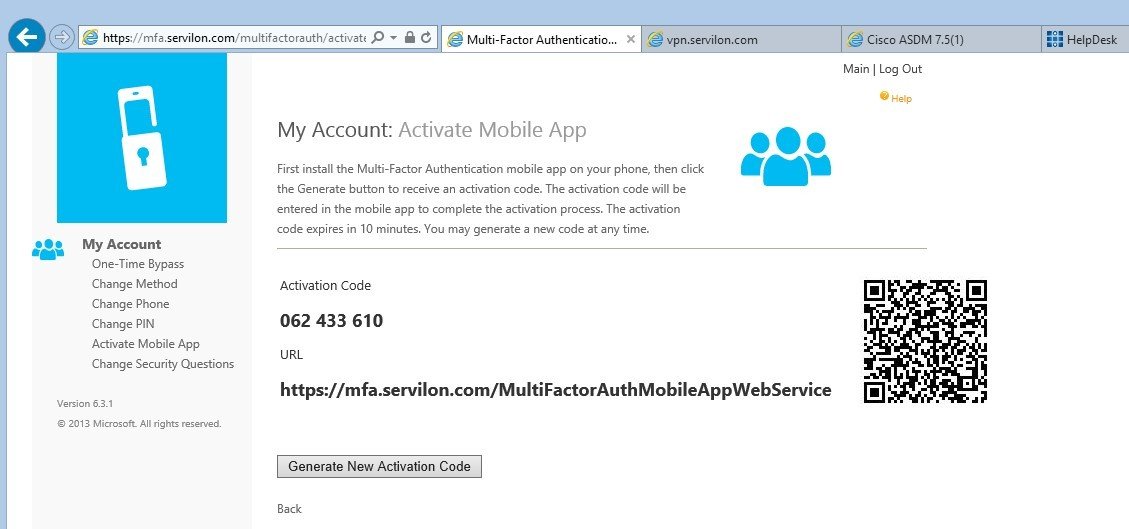
The Azure Authenticator app must be installed on your mobile device (links for iOS, Android and Windows Mobile).
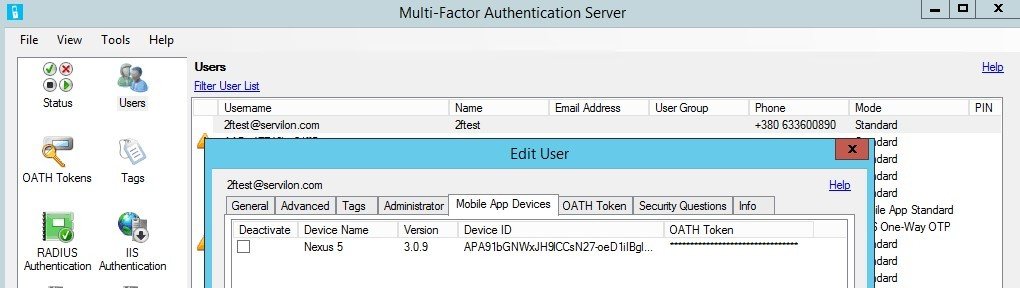
Run the application, tap + and scan the QR code. The account will be synced to your mobile device:
Verify this on the server:
Now you can experiment with different authentication modes and see the difference between the Standard and OATH Token modes.
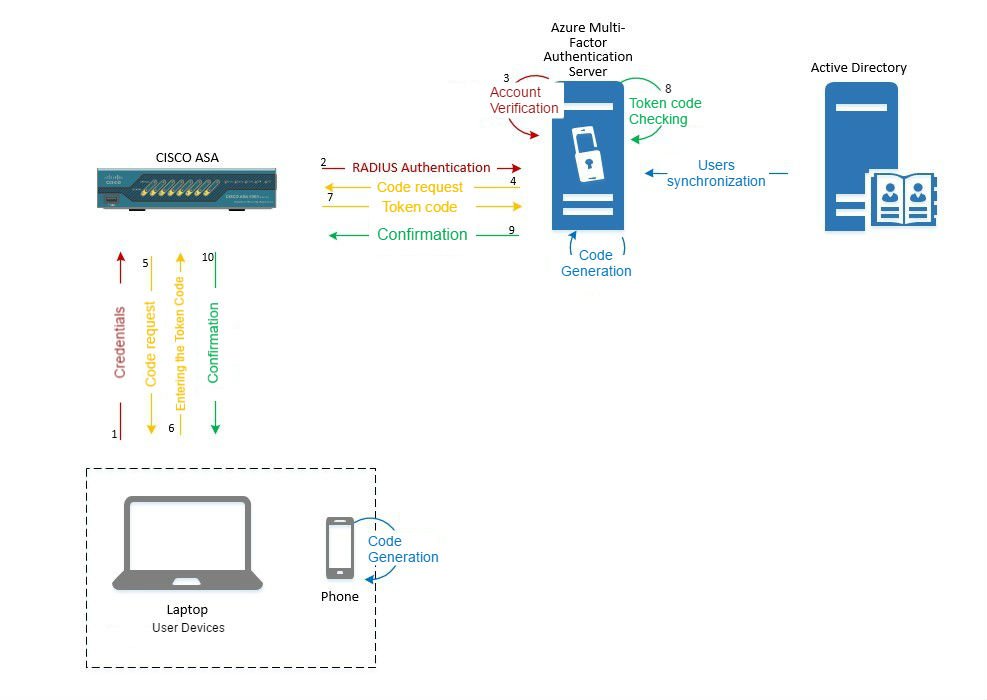
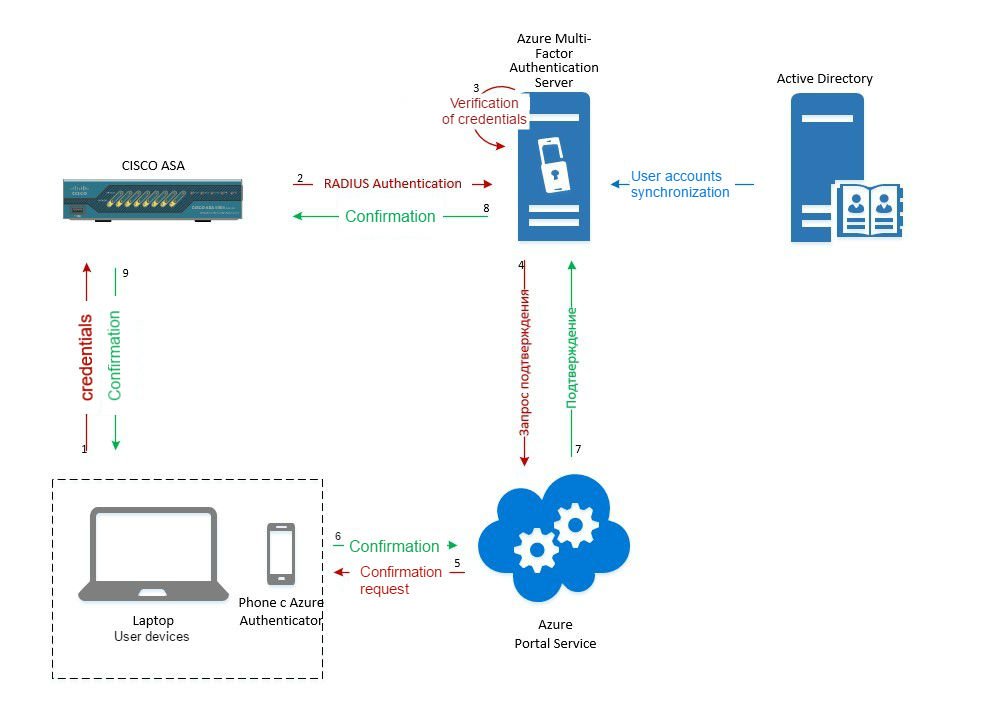
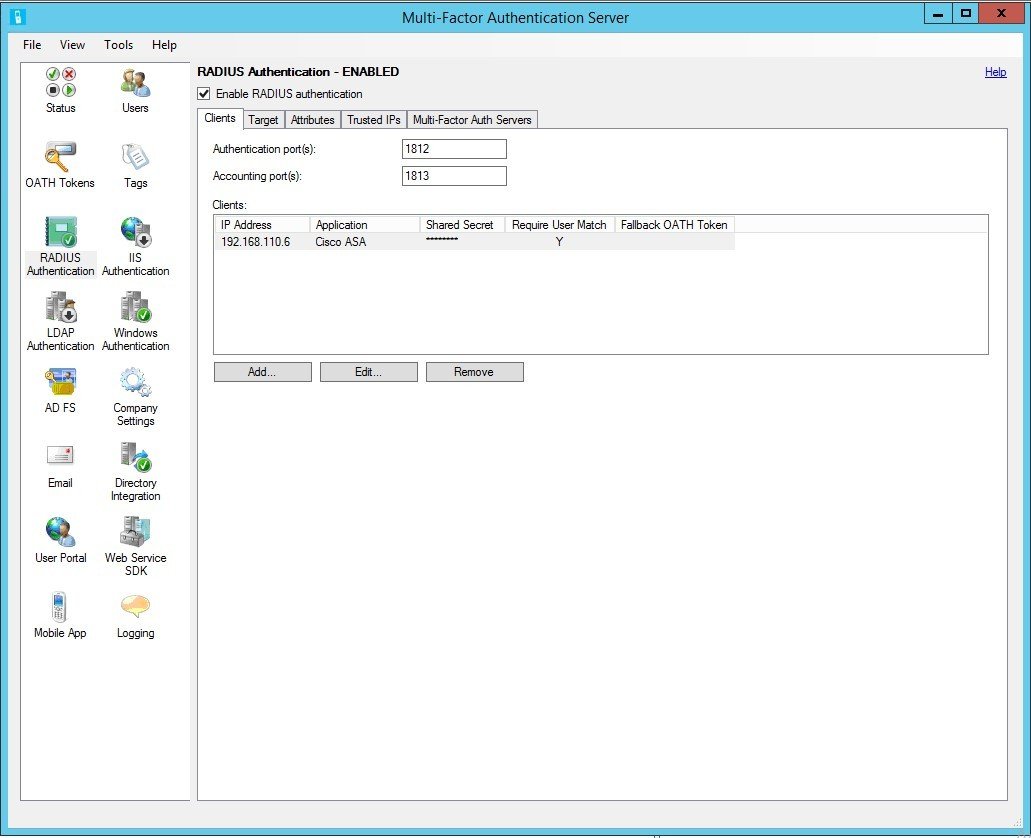
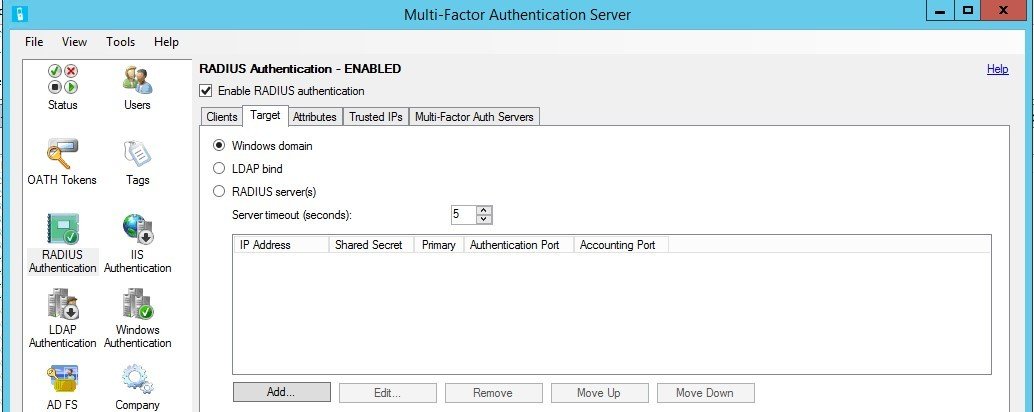
Configuring Radius
AnyConnect Cisco ASA can use a third-party Radius server for user authentication. On ASA, configure the AAA Server. On MFAS, configure the Radius client:
Configuring CISCO ASA
Since we are using domain authentication, ASA must be trusted by the domain. It is also recommended to use a «white» certificate for the VPN gateway. In our case, this is vpn.servilon.co.
On ASA, you can configure the AnyConnect VPN gateway with local authentication. Make sure that the connection works, then proceed to configuring authentication through Radius.
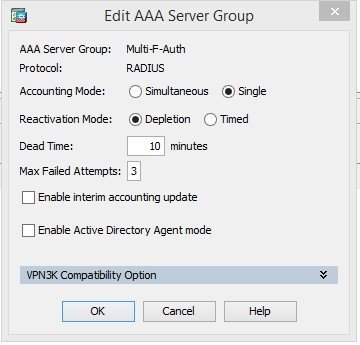
Then configure RADIUS. Go to Configuration / Remote Access VPN / AAA/Local Users / AAA Server Groups, and create a group:
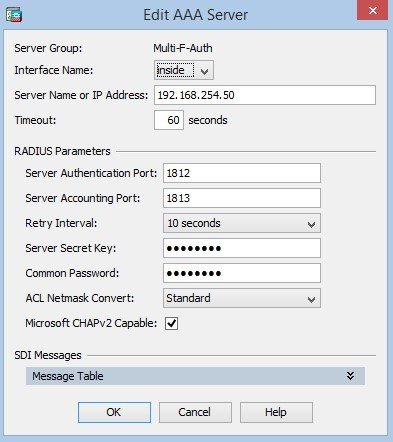
Add the server to the group. You need to increase the timeout, because the default value may not be enough to enter the code.
Test the connection with the RADIUS server:
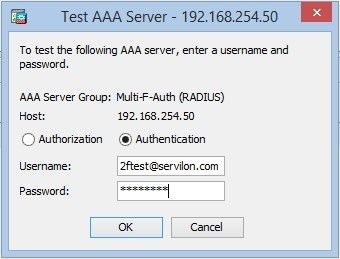
After a successful test, in previously configured AnyConnect connection profiles, change authentication from local to the new group:
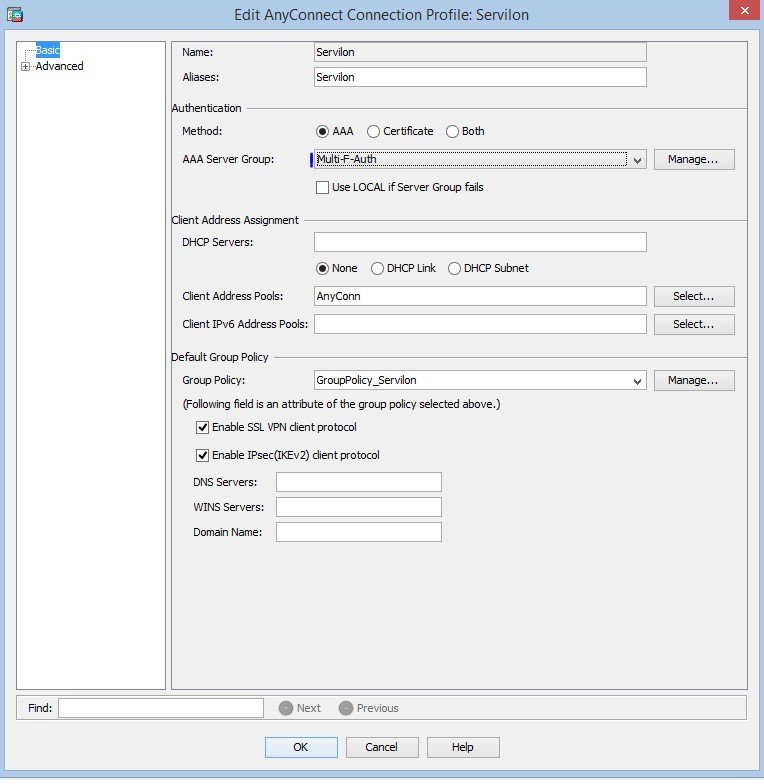
Profile configuration:
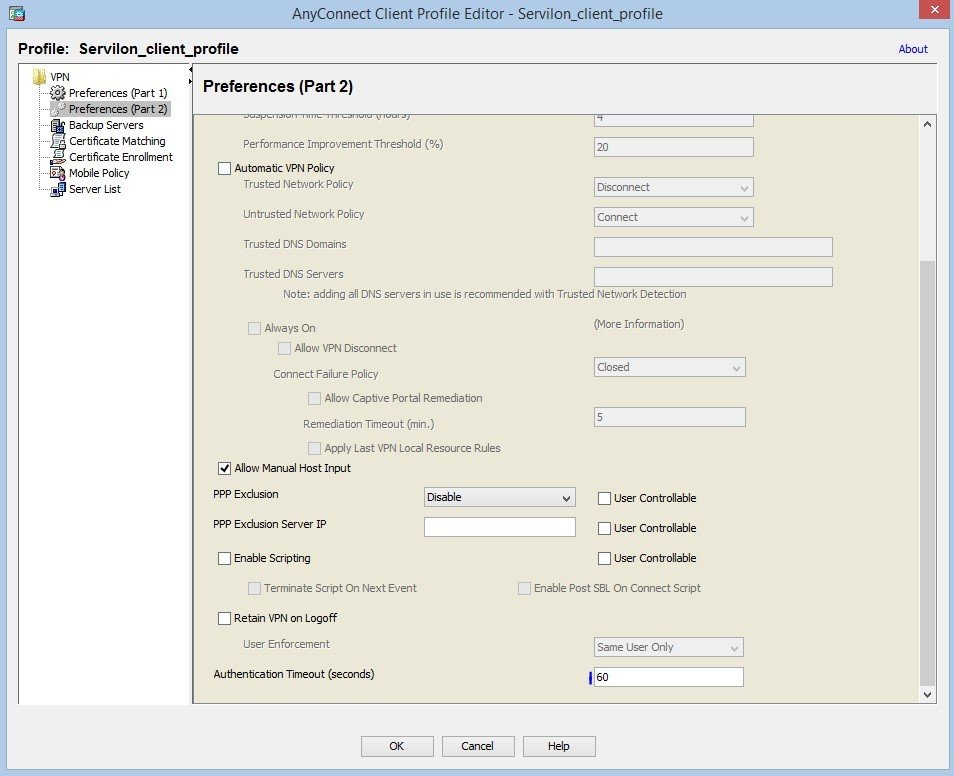
- 1. Change the timeout:
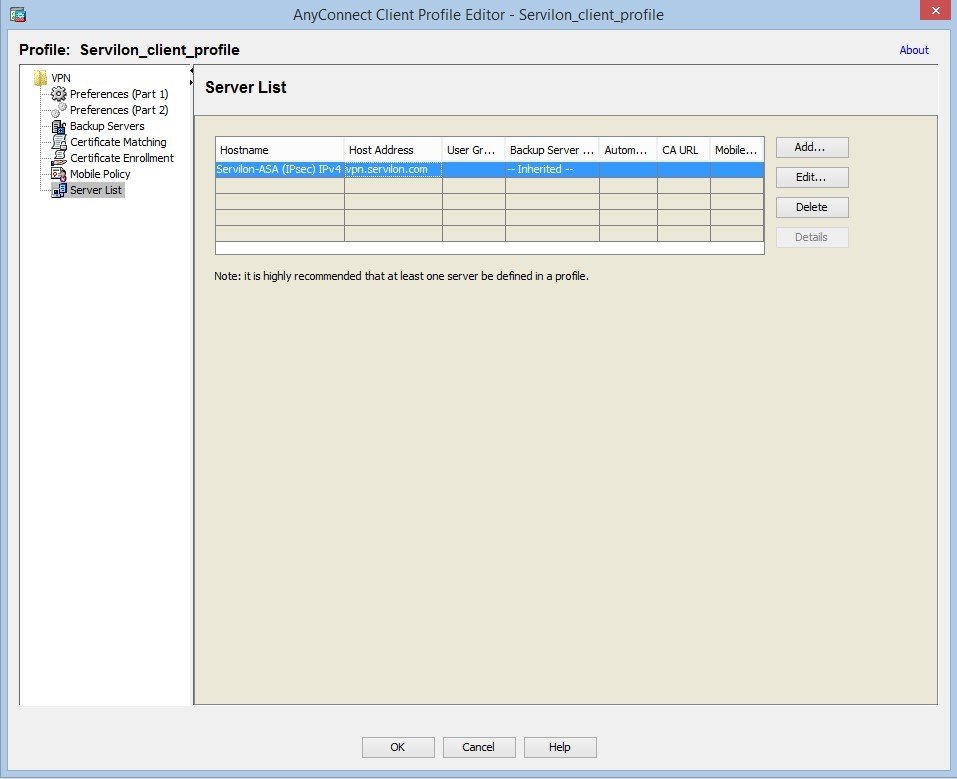
- 2. Specify FQDN for the AnyConnect gateway.
In order to test the connection with authentication in Standard mode or OATH Token mode, connect to FQDN and enter the domain credentials.
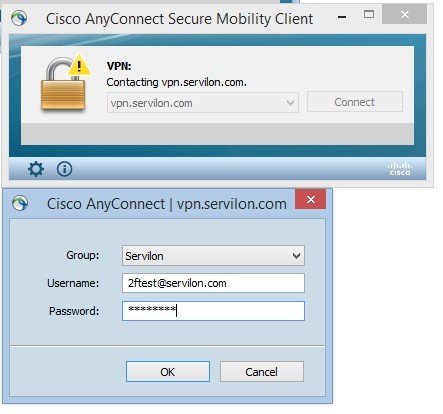
You will be prompted to enter a code from the mobile app. If you are using Standard mode without a PIN, the application will receive the authentication confirmation.
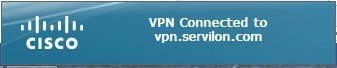
After verification via the second factor, the user is authenticated. You will see this:
This article describes configuring two-factor authentication for Cisco AnyConnect, but this setup can be implemented for any service that supports authentication via the Radius protocol.
We can configure two-factor authentication on your infrastructure. Send us your request, so we can contact you in shortly.