Connecting to corporate resources via Cisco AnyConnect using FreeRadius and Google Authenticator has its pros and cons.
One noteworthy advantage is the cost: it’s free.
Disadvantages include the following:
- Integration with AD. Of course, you can integrate FreeRadius with AD via LDAP, but this solution’s architecture requires storing user profiles locally on the FreeRadius server.
- Only one type of authentication – Time-Based One-Time Password (TOTP).
- Non-obviousness of the need to use the second factor (as explained in this article).
Installation of Components
In this case, we will install FreeRaduis using Debian Jessie 8.0 on a virtual machine.
Due to the fact that TOTP will be used for authorization, the server time must be correct. The best way to synchronize time is to install NTP.
sudo apt-get update
sudo apt-get install ntp
Next, install FreeRadius and other necessary modules:
sudo apt-get install build-essential libpam0g-dev freeradius
libqrencode3 git
Download and install Google Authenticator:
cd ~
git clone https://code.google.com/p/google-authenticator/
cd google-authenticator/libpam/
make
make install
You will also need a group for users who we do not need to authenticate
addgroup radius-offFreeRadius Setup
Since FreeRadius must have access to .google_authenticator tokens in all user directories, it must have root-a rights. To provide these rights, edit the /etc/freeradius/radusd.conf file.
Find the following lines:
user = freerad
group = freerad
And change them to:
user = root
group = root
Save changes at this point and throughout the process.
Now edit /etc/freeradius/users. Add the previously created «radius-off» group to the «Deny access for a group of users» section. After the following lines:
# Deny access for a group of users.
#
# Note that there is NO 'Fall-Through' attribute, so the user will not
# be given any additional resources.
Add:
DEFAULT         Group == "radius-disabled", Auth-Type := Reject
Reply-Message = "Your account has been disabled."
DEFAULT        Auth-Type := PAM
Now edit /etc/freeradius/sites-enabled/default.
Locate:
#  Pluggable Authentication Modules.
#  pam
And uncomment the line with «pam».
Edit /etc/pam.d/radiusd. Tell FreeRadius to authenticate users using a local Unix password and a Google Authenticator code.
Erase all the lines beginning with @:
#@include common-auth
#@include common-account
#@include common-password
#@include common-session
And add:
auth requisite pam_google_authenticator.so forward_pass
auth required pam_unix.so use_first_pass
Now we need to add the client’s Radius so FreeRadius processes requests from CISCO ASA. Add the following to the /etc/freeradius/clients.conf file:
Client 192.168.110.6 {
secret = Password
shortname = ASA
}
User setup
Create a user:
adduser mfatestCreate google-authenticator for the user:
cd /home/mfatest/
su mfatest
google-authenticator
You should see a QR code in response:
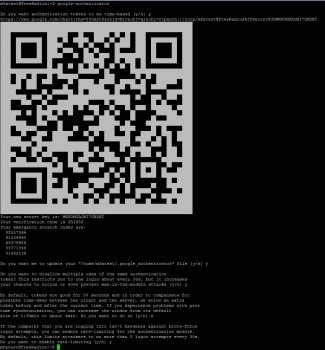
Afterwards, restart the FreeRadius service:
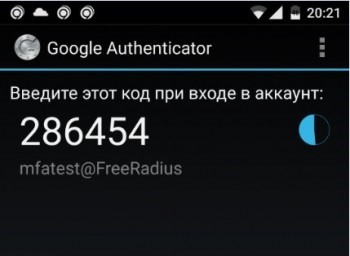
sudo service freeradius restartYour mobile device must have the Google Authenticator app installed (links for iOS and Android).
Scan the QR code using the Google Authenticator app. This will link the «mfatest» account to your mobile device.
Now test authentication:
radtest localhost 18120 testing123Where:
- localhost 18120 testing123 are the parameters for the standard local Radius client.
You should see the following as a result:
radtest mfatest Pass_123731923 localhost 18120 testing123
Configuring CISCO ASA
For ASA, the best option is to configure the AnyConnect VPN gateway with local authentication. Make sure that the connection works. Then proceed to configuring authentication through Radius.
Configure RADIUS:
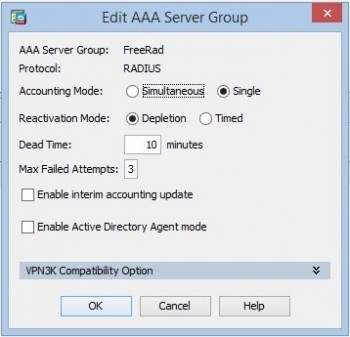
1. Go to Configuration / Remote Access VPN / AAA/Local Users / AAA Server Groups and create a group:
2. Add the server to the group:
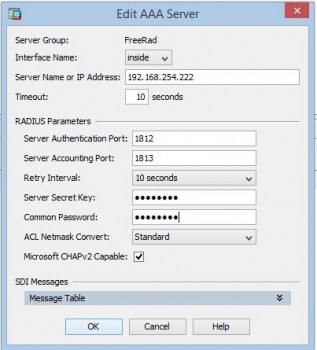
«Server Name or IP Address» is the address of our FreeRadius server. «Server Secret Key» is the key we have configured for the client.
3. Test the connection with the RADIUS server:
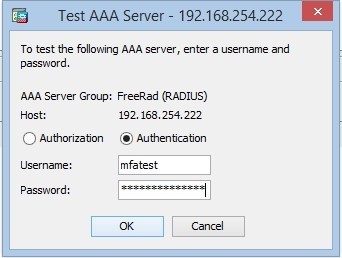
«Password» is the user’s password + the code from Google Authenticator.
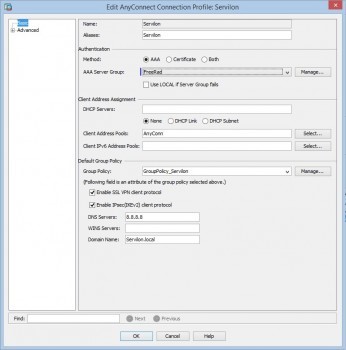
After a successful test, on the previously configured «AnyConnect Connection Profile», change authentication from the local server group to the FreeRad group:
This completes the configuration process. To make sure that everything works properly, initiate a test connection.
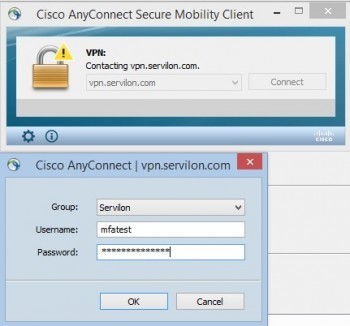
Here we encounter the non-obviousness mentioned earlier. FreeRadius does not use step-by-step authentication. It cannot request a code for Google Authentication separately. Therefore, to authenticate successfully, enter password + code in the Password field, just as in the tests. For the inexperienced user, this may become a barrier to using the service.
This setup is universal and can be implemented for any service that supports authentication via the Radius protocol.