This post continues the series of articles about SharePoint Server. In the first part, we looked at features for collaborating using Office Online and the desktop version of MS Office programs. This article will show you how to start and publish using SharePoint + Office Online.
We consider the case when it is important for the company to keep all the infrastructure and data stored in it under their control. In other words, with an extensive on-premise SharePoint 2016 farm.
Let’s get started.
DNS
In our case, we use Split DNS where the names for internal and external areas are the same.
For example: External domain servilon.com, external names: sp2016.servilon.com and oos2016.servilon.com.
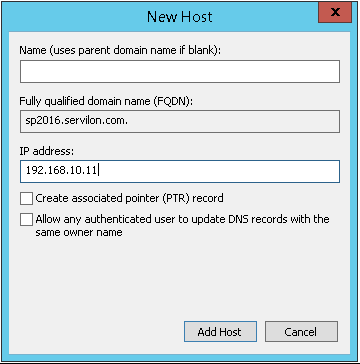
Solution: On the internal DNS, add two new Forward Lookup Zones with the corresponding names: sp2016.servilon.com and oos2016.servilon.com.

Add an A amount of records indicating the local address of the server in each zone:

Certificate
Issue a certificate for both services right away. We added both names to the subject alternative name (SAN): sp2016.servilon.com and oos2016.servilon.com. To avoid problems on devices outside of the domain, you need to issue your certificate by a trusted certification authority.
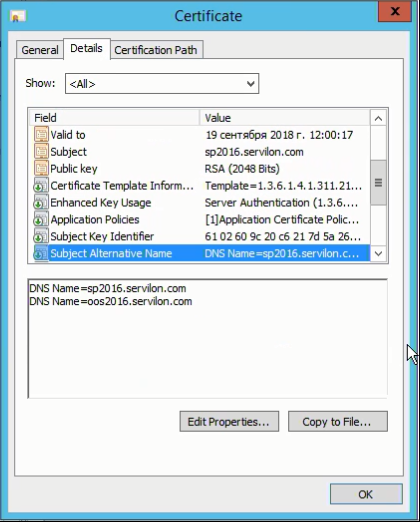
We will mention this certification three more times. It will be used on the SharePoint Server (in IIS), on the Office Online Server, and for Application Request Routing (ARR) for publishing sites.
SP Settings
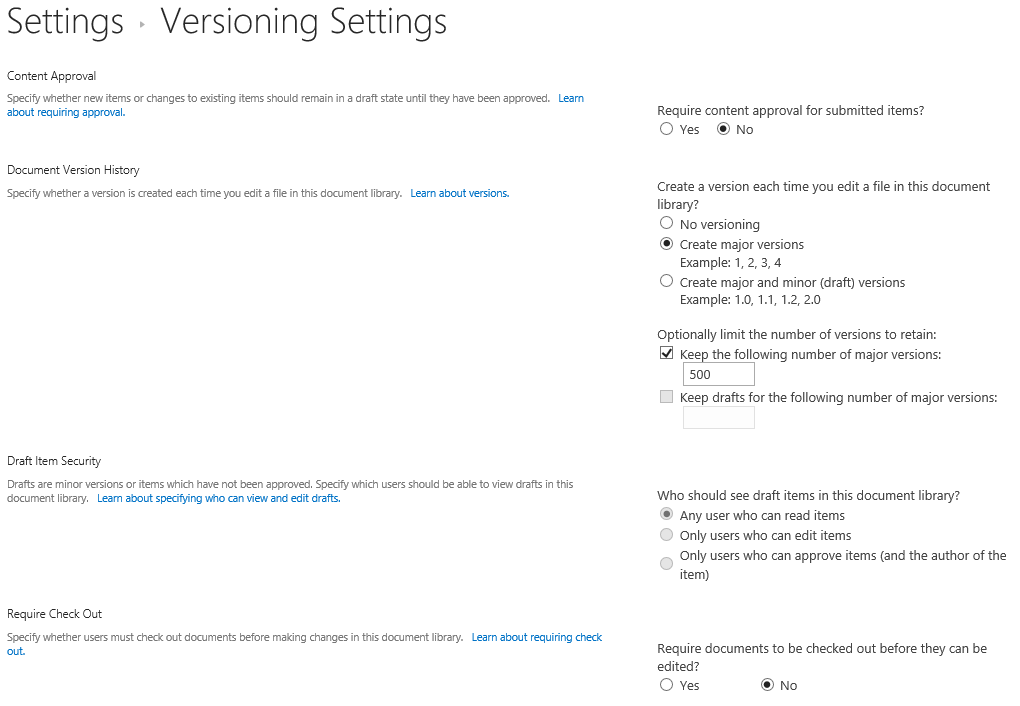
Here we will skip the SharePoint Server installation process, because this topic has been covered in numerous articles, walkthroughs, and TechNet. Note that Microsoft is pushing us to cooperate and communicate in its Windows 2016 Server – versioning settings are already configured to work together by default for a document’s library (Library> Library Settings> Versioning Settings)
Document Version History is set to «Create major versions»;
Require Check Out is set to «NO».
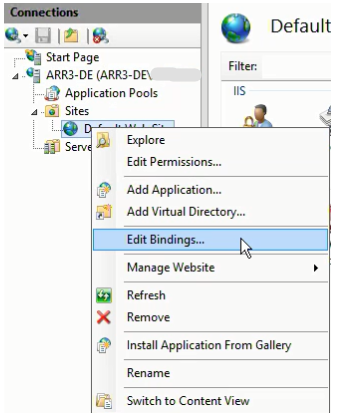
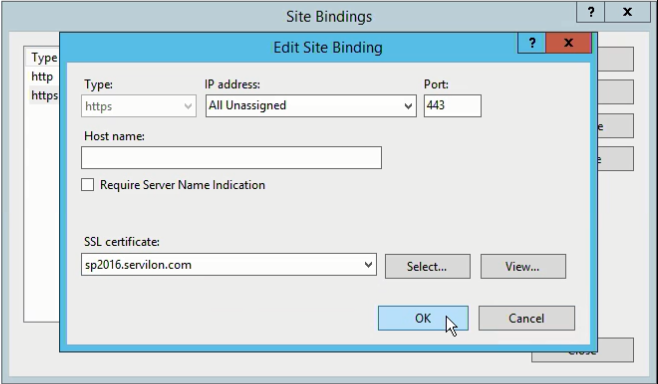
It’s time to remember security and our certificate, so we specify it in the Bindings for our SP site.

OOS Settings
MS says the minimum hardware requirements are identical to the requirements for SharePoint Server 2016:
- RAM: 12GB
- Processor: 64-bit, quad
- HDD: 80GB
In reality, the test environment RAM can be significantly cut back.
- Install the .NET Framework 4.5.2 on the server;
- Install the necessary components by OS command below:
Install-WindowsFeature Web-Server, Web-Mgmt-Tools, Web-Mgmt-Console, Web-WebServer, Web-Common-Http, Web-Default-Doc, Web-Static-Content, Web-Performance, Web-Stat-Compression, Web-Dyn-Compression, Web-Security, Web-Filtering, Web-Windows-Auth, Web-App-Dev, Web-Net-Ext45, Web-Asp-Net45, Web-ISAPI-Ext, Web-ISAPI-Filter, Web-Includes, InkandHandwritingServices, Windows-Identity-Foundation
- After installation is finished, reboot the system;
- Run the OOS installation, the installation wizard only asks to specify the installation path;
- Configure the OOS farm (using a secure connection — https):
-
- Import the previously issued certificate.
- Create the OOS farm using a PS command:
New-OfficeWebAppsFarm -InternalURL «https://oos.contoso.com» -ExternalURL «https://oos.contoso.com» -CertificateName «Certificate Friendly Name»

To enable editing mode on OOS, use the following PS command:
Set-OfficeWebAppsFarm -EditingEnabled
InternalURL and ExternalURL are identical as configured by Split DNS.
Back on the SharePoint server, there are just two commands:
1. In SharePoint 2016 Management Shell run the following command as an administrator:
New-SPWOPIBinding -ServerName «OOS server name»

2. Since our SharePoint is used both internally and externally, you should change the infrastructure zone to external-https:
Set-SPWOPIZone -zone “external-https”

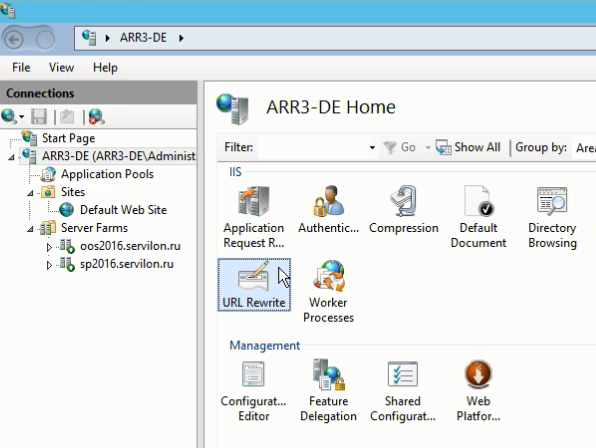
Configure publishing on ARR
- Import our certificate in IIS.
- Specify its other Bindings.
Create 2 farms for sp2016.servilon.com and oos2016.servilon.com.
Edit URL Rewrite at the server level

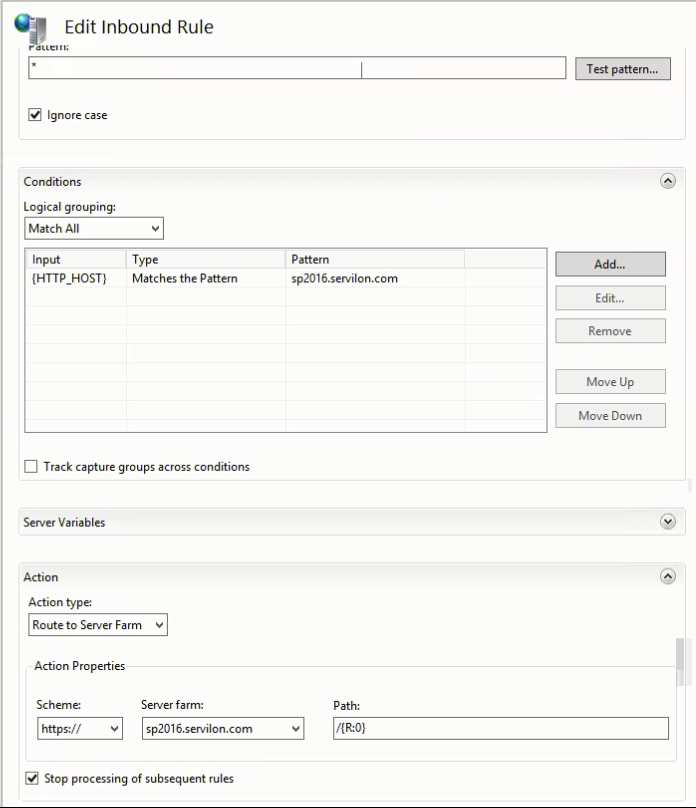
For SP:
- Add a Condition

- Paste https:// in Action Properties
Repeat the same actions for OOS.
As a result, we get the following settings:

After editing IIS, restart the service using the following command — iisreset.
You’re done! Now you have oos2016.servilon.com server as a server used for running in a browser and on mobile devices, and sp2016.servilon.com as a connection point to the SharePoint site.
In the next part, I will try to answer questions asked about OneDrive for Business.
We offer IT support services include SharePoint server maintenance. Please, feel free to contact us today and speak with one of our specialists.