
Many companies using VDI infrastructure for remote work from the uncontrolled personal workstations of the company’s employees. External users face the problem of distrusting the certificate issued by the corporate certifying authority when publishing a VDI farm to the Internet. As a result, security warnings appear when connecting remotely.
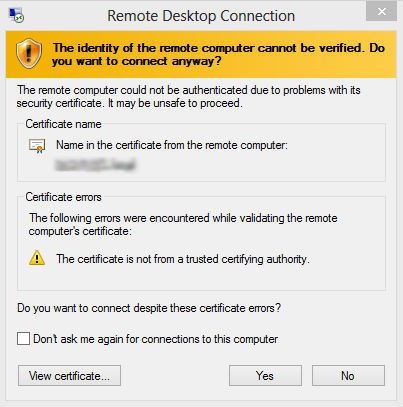
In this case, the warning appears twice: at the first connection the broker server is untrusted; at the second connection, the VDI farm virtual machine is untrusted.
To resolve this problem, many system administrators suggest either checking the “Don’t ask me again” checkbox and ignoring this message, or “whitelisting” the root certificate on user’s remote computer and publishing the corporate CA’s CRL. However, such methods don’t work if users connect from different locations each time or connect to different virtual machines.
Solving this problem requires you to use a “white” certificate issued for the VDI farm by the trusted certificate authority. The names of the external certificate and the VDI computers must match.
The solution
First of all, we need a wildcard certificate (*.yourcompany.com) issued by the trusted certificate authority.
Add a new DNS suffix to the domain:
Add a new Active Directory Integrated zone (yourcompany.com) to serve internal requests for new server names and VDI farm virtual machines on a domain controller in DNS.
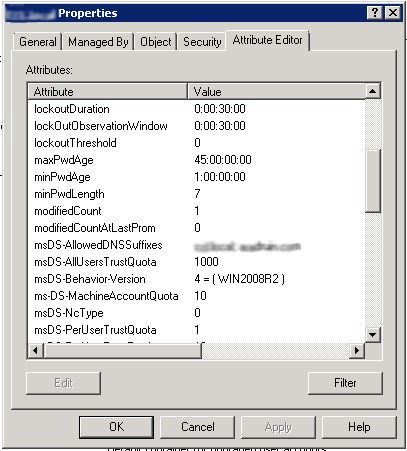
To have an additional domain suffix in a domain you have to edit the msDS-AllowedDNSSuffixes attribute at the domain level. You must add the internal and external domain names as the attribute value. For example, yourcompany.local and yourcompany.com. Create a new group policy at the domain level to specify the DNS suffixes that can be added to short names in DNS queries.
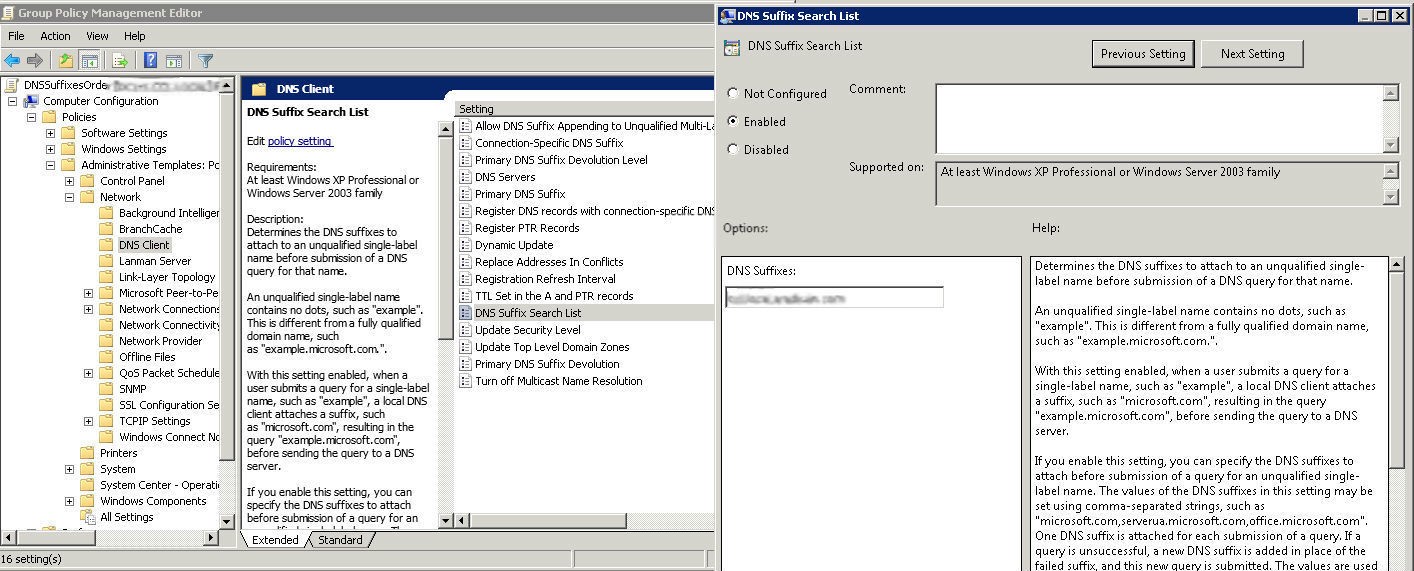
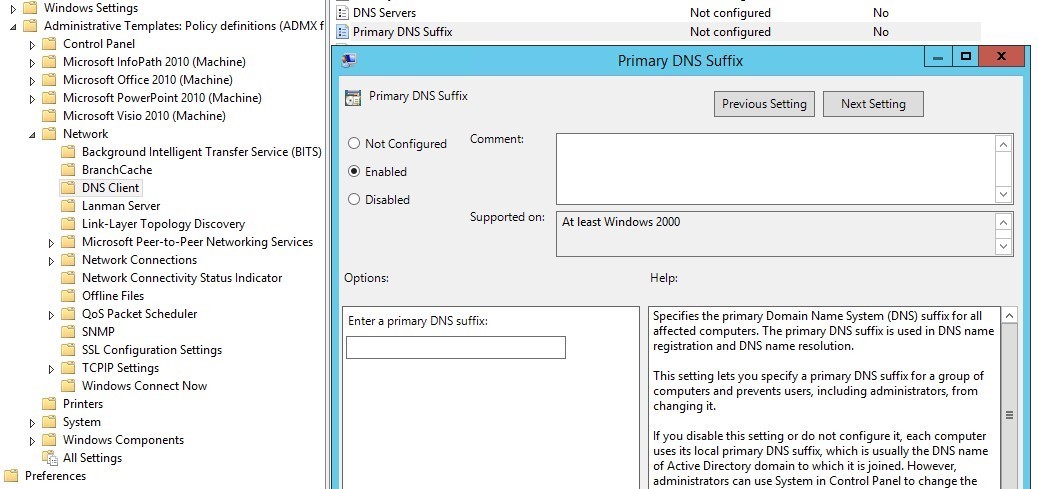
Enable the following policy: Computer Configuration \ Policies \ Administrative Templates \ Network \ DNS Client\ DNS suffix search list. Then add the internal and external domain name values, separated by commas.
Setup certificate for RD server
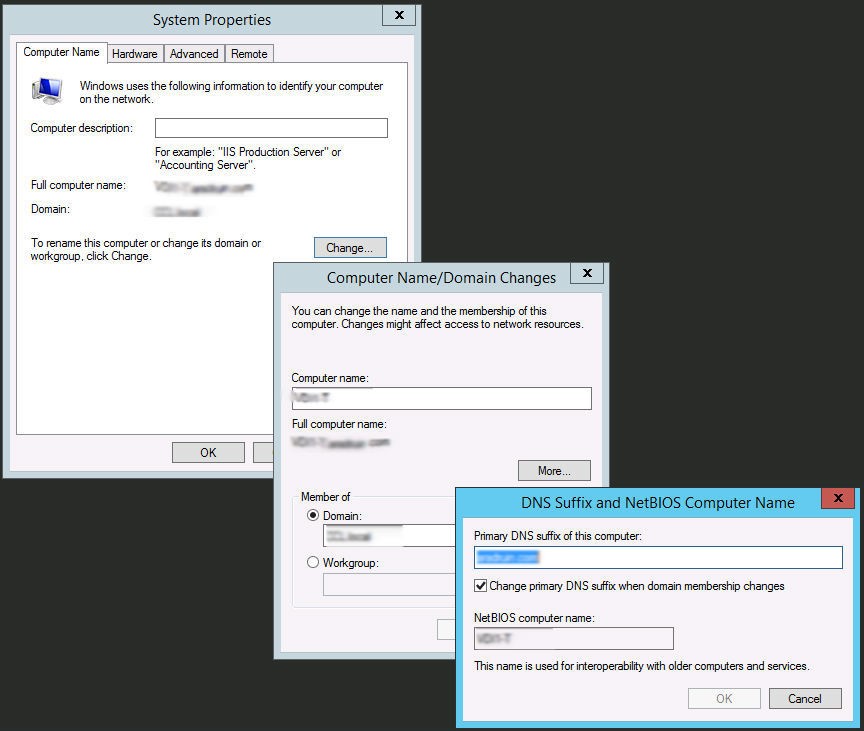
You also have to change the DNS suffix of the planned RD servers to the external domain name before creating the VDI farm. Go to system properties and click “Change…”. Click “More…” on the “Computer Name/Domain Changes” tab and enter the new primary DNS suffix – yourcompany.com.
Next create a new VDI farm based on the selected Microsoft Windows Server 2012 R2 servers. You can easily find information online about how to do this.
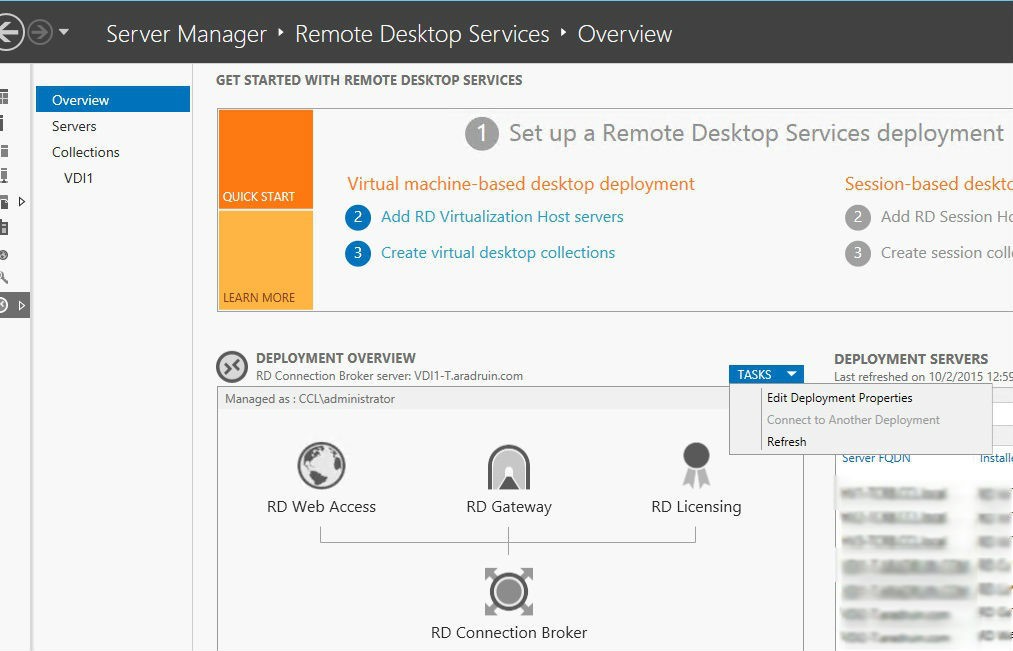
After you receive the certificate’s pfx file, you can install it on the new VDI farm. On the RD Connection Broker server, go to Server Manager > Remote Desktop Services > Overview. In the Deployment Overview field, select Edit Deployment Properties in the Tasks dropdown list.
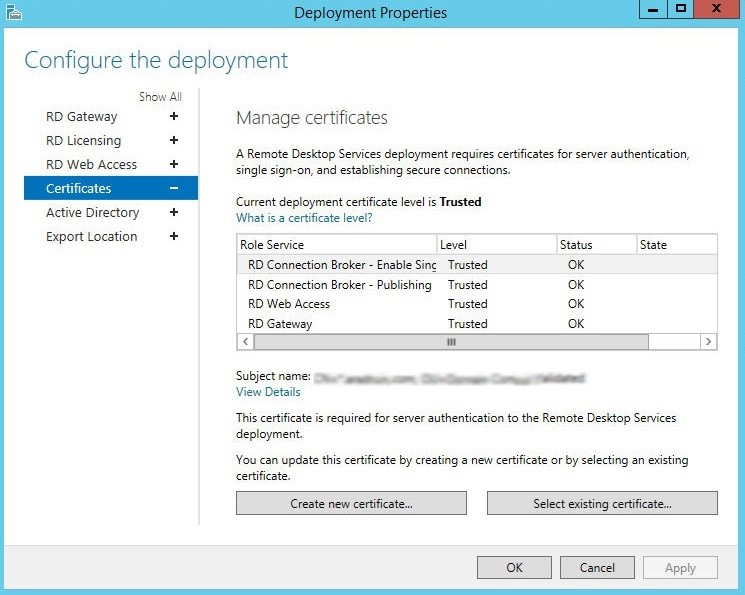
Open the Certificates tab and set up the necessary *.yourcompany.com certificate for each farm service.
Add the certificate for each service role. Click “Select an existing certificate…”, then specify its file path and password.
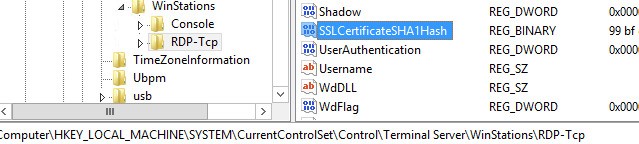
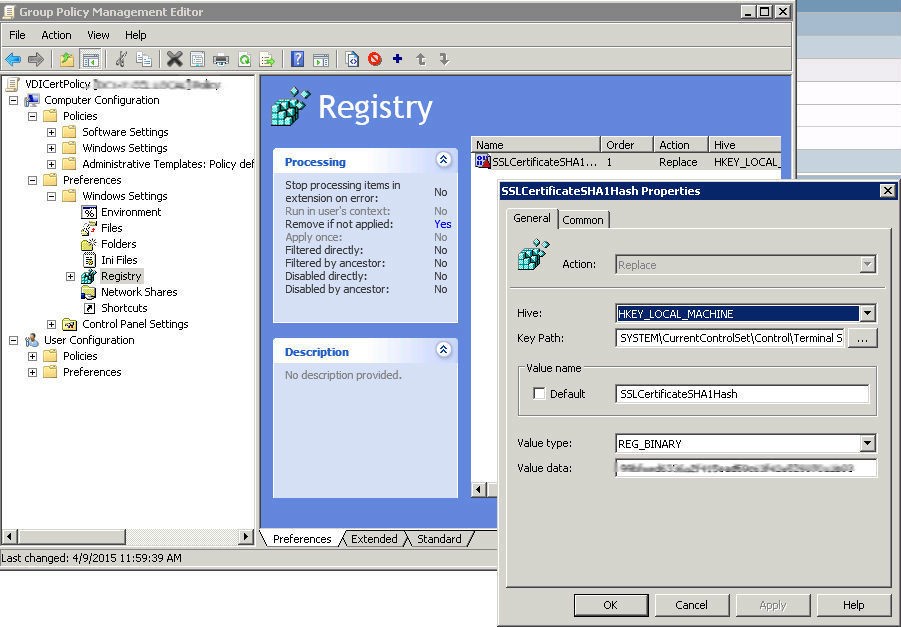
In the end, the following certificates will be installed on the VDI servers, but not on virtual machines. The SSLCertificateSHA1Hash REG_BINARY parameter appears with the thumbprint certificate value in the registry on Connection Broker server at the following path:
HKEY_LOCAL_MACHINE\SYSTEM\CurrentControlSet\Control\Terminal Server\WinStations\RDP-Tcp.
This parameter determines which certificate will be used while the RDP session is being established. Add it to the registry on the client machine as well.
Installing the certificate on virtual machines
The following are required when using a white certificate on virtual machines:
- Install the certificate in the personal certificate store on every machine.
- Set the certificate key read permissions for each machine’s Network Service.
- The SSLCertificateSHA1Hash REG_BINARY certificate parameter must have the thumbprint value.
- Virtual machines names must match the certificate name (have the yourcompany.com suffix)
Create a new group policy at the Organizational Unit level, dedicated to the VDI farm’s virtual machines’ accounts.
This policy must run Startup Script ExportVDICert.bat on the virtual machines.
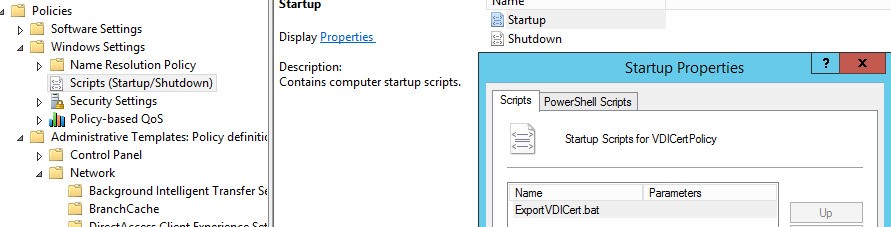
The script below uses the Microsoft Certutil and FindPrivateKey utilities. Certutil is a built-in utility. FindPrivateKey is provided as a Sample tool for developers and can be compiled independently. The script must be added to the policy.
The certificate and FindPrivateKey utility must be placed in the network folder where the script will grab the installation files. Here’s the script:
certutil -f -p "" -importpfx "" NoExport
c:
mkdir "c:\TempCertSecurity"
cd "c:\TempCertSecurity"
xcopy "" "c:\TempCertSecurity"
FindPrivateKey.exe My LocalMachine -t "
"
-a > tmp.txt
set /p myvar= < tmp.txt
del tmp.txt
del FindPrivateKey.exe
cd \
rd "c:\TempCertSecurity"
cacls.exe %myvar% /E /G "NETWORK SERVICE":R"
This script will install the new certificate with permissions after the virtual machine is rebooted.
The next part of the policy has to do with the SSLCertificateSHA1Hash installation option. The required key is configured via Preferences \ Windows Settings \ Registry
To change virtual machines’ Primary DNS Suffix in the policy in a central way, enable the Primary DNS Suffix and set yourcompany.com as the external domain name.
The machine will receive the new FQDN and corresponding white certificate after being rebooted. After you perform all these operations, your users will no longer see the annoying security alerts.
We offer IT support services include VDI maintenance. Please, feel free to contact us today and speak with one of our specialists.